
Google Forms is a free online form builder app that offers all the features you need to create a simple poll or dynamic survey: you can add different question types, use form logic, customize the form to match your branding, and thanks to its deep integration with Google Sheets, you can gather data and mine it for insights without leaving Google Workspace.
Turn forms and surveys into business growthWe have a lot of ground to cover, so let's dive right in. Here's everything you need to know to create and share Google Form surveys.
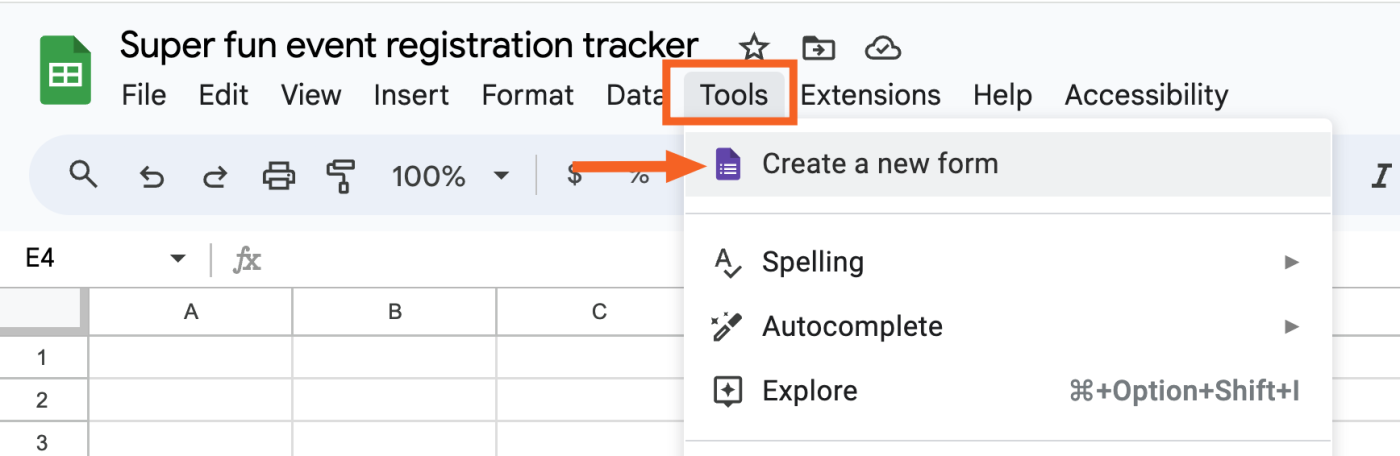
The simplest way to create a Google Form is directly from the Google Forms web app.

You can also create a new Google Form directly from Google Sheets. This is the quickest way to automatically sync your form data with a new or existing spreadsheet.
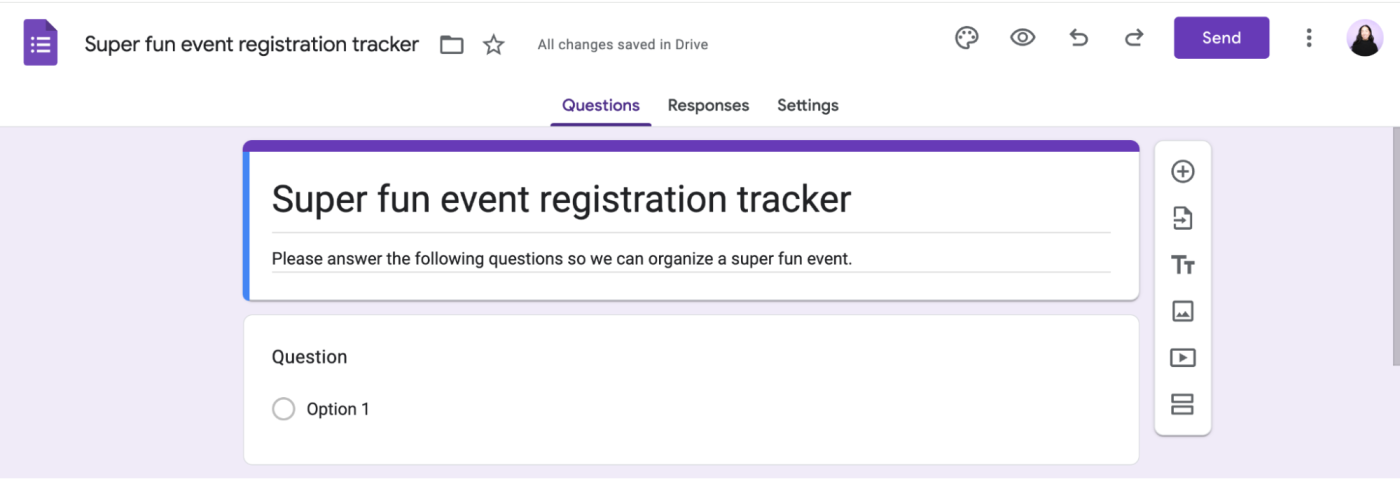
A blank form will automatically appear in the Google Forms editor. By default, the form title will be the same as your spreadsheet. Or, in the case of creating a new form directly from Google Forms, it'll appear as Untitled form . You can also enter a form description to help respondents understand the purpose of your survey.
Using the Google Forms editor is straightforward. Click a form field to add and edit a question. To add more questions, click the Add question icon, which looks like a plus sign ( + ), in the floating toolbar next to your question box. And to modify the question type, click the dropdown next to the question field.
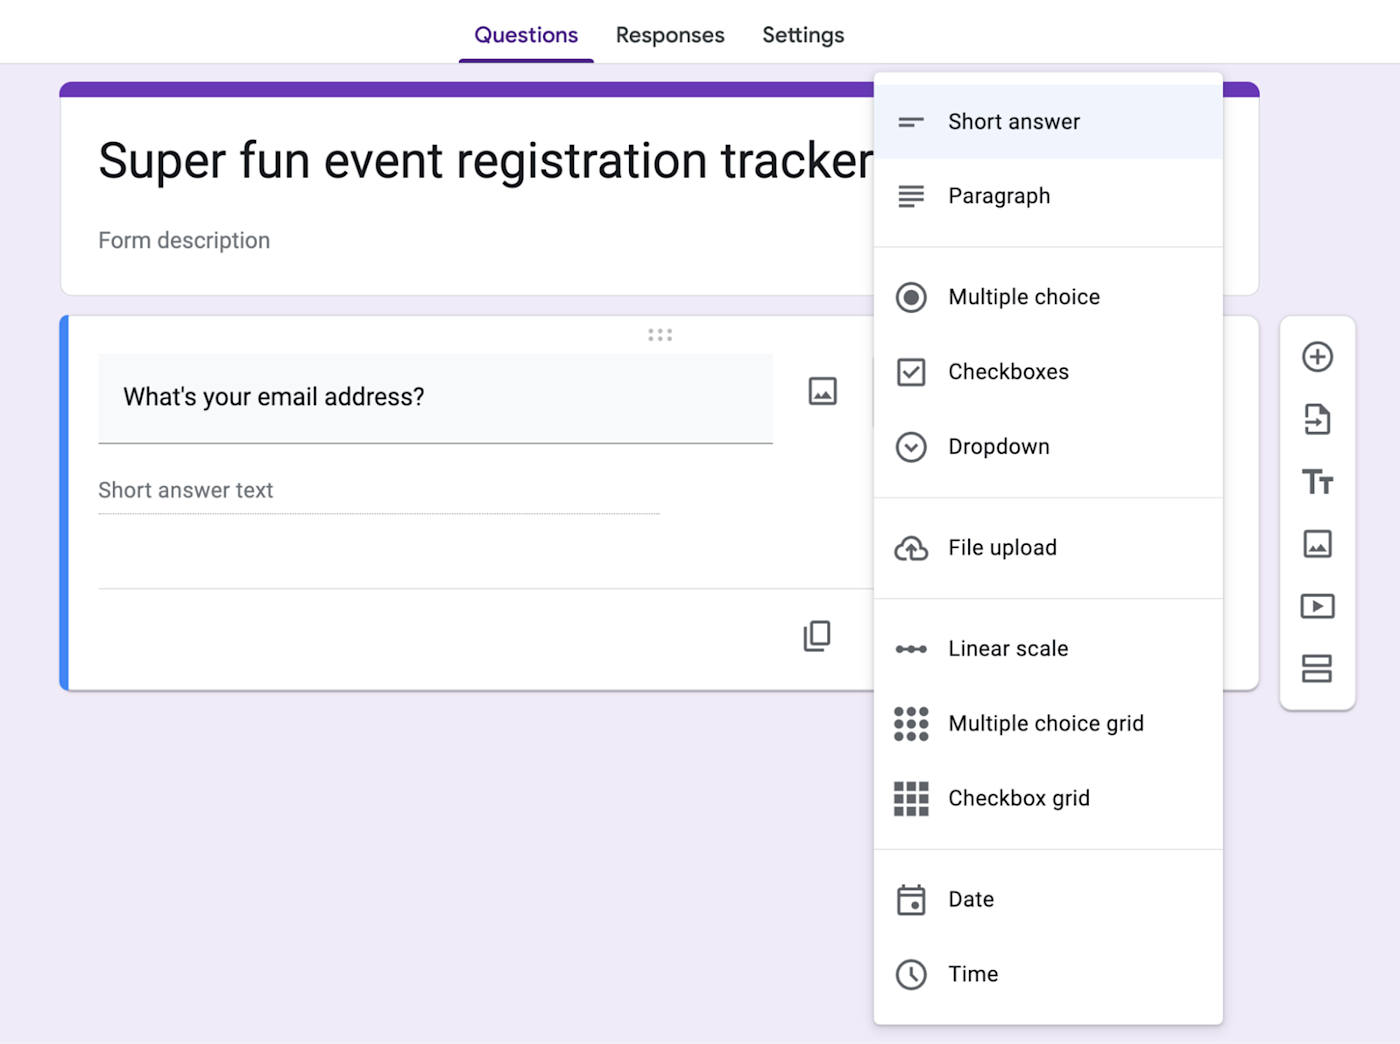
Google Forms offers eleven different question types. Here's what each one does:
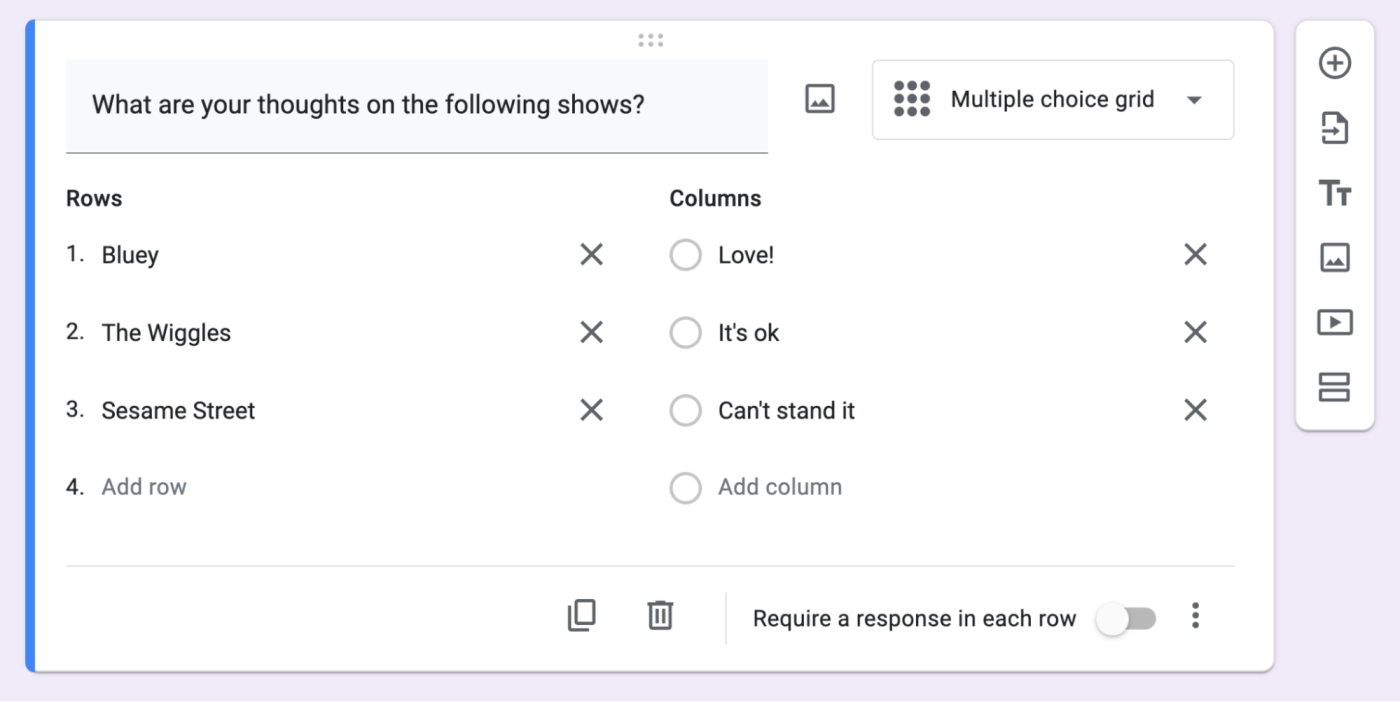 Example of a multiple-choice grid question in the Google Forms editor." />
All question types allow you to insert an image, but if you want to add only an image or video with no question, you can do that, too. Click the Add image or Add video icon in the floating toolbar, and choose the image or video you want to insert.
 Example of a Google Forms field with only an image and text." />
Note: Google Forms supports only YouTube videos, which you can add through search or with a link.
Whether you've added images or videos, your entry will have the standard title and description fields, along with options to resize and show the video or image center-, left-, or right-aligned.
Accidentally remove a form element or add one too many? Press command + Z or Ctrl + Z to undo, just as you would in a document.
Simple forms need only a few fields, but longer surveys can quickly get overwhelming with dozens of questions listed on one page. That's where sections come in handy: they let you break your form up into chunks so that respondents answer only one set of questions at a time.
Click the Add section icon, which looks like an equal sign ( = ), from the floating toolbar.
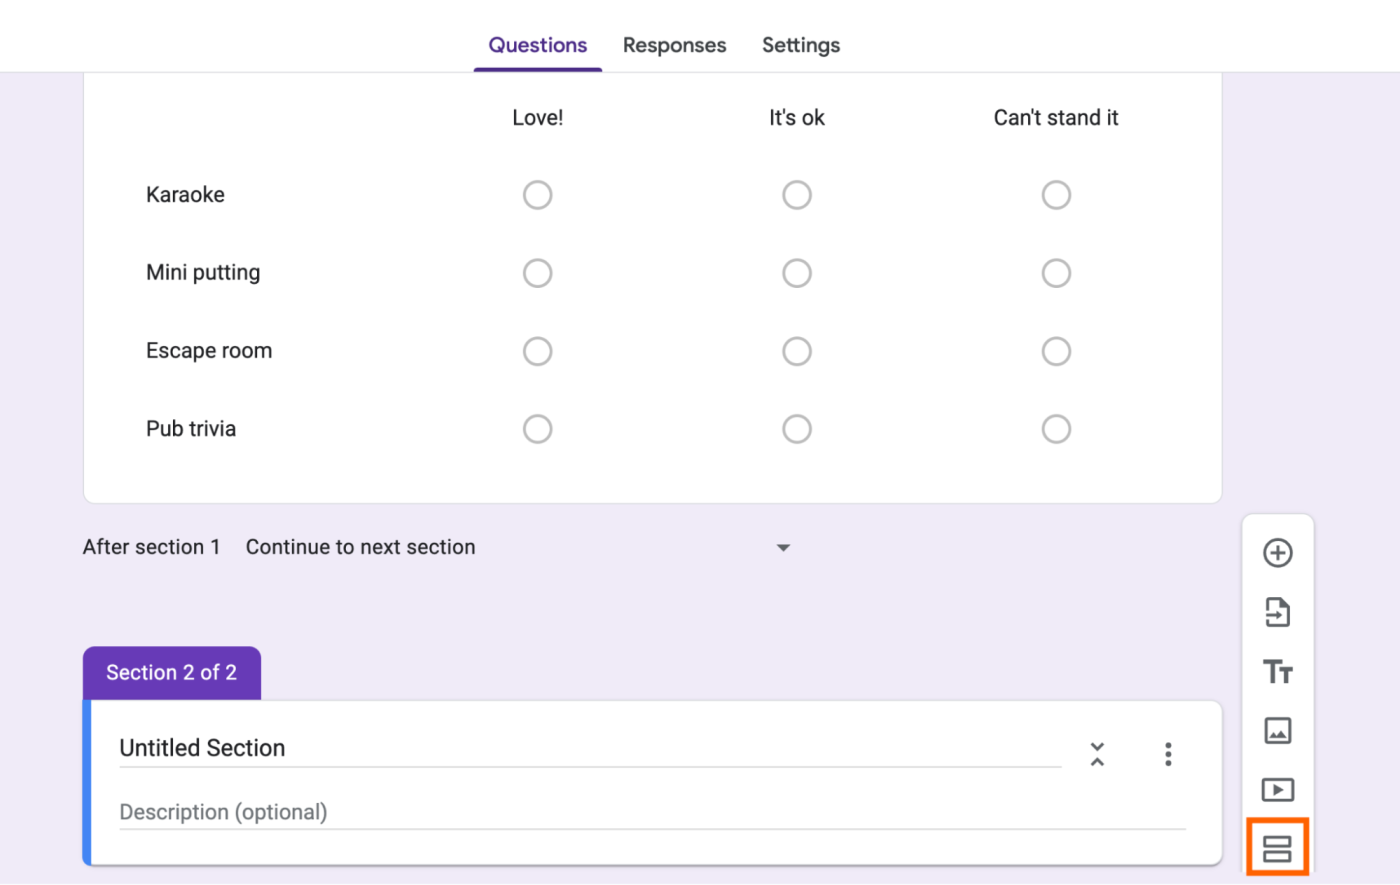
This will add a new section below the current question. Each section includes its own title and description, along with an Expand/Collapse section option to keep your form editor manageable.
Let's say you want to ask a respondent follow-up questions based on their answer. This is where form logic comes in.
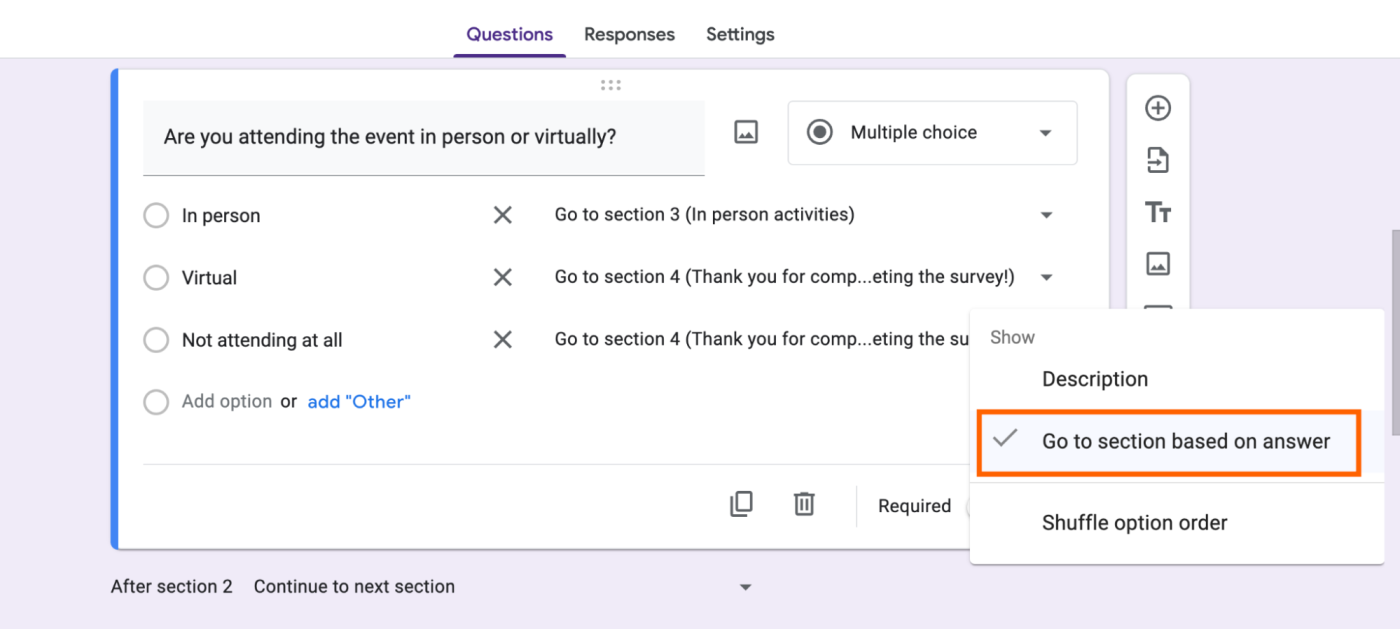 Example of a multiple-choice question field in Google Forms that uses section logic." />
Note: Be sure to not select your current section's name, or you'll end up making a loop where respondents can never get to the end of your form.
For step-by-step instructions with screenshots, check out how to create form sections and logic.
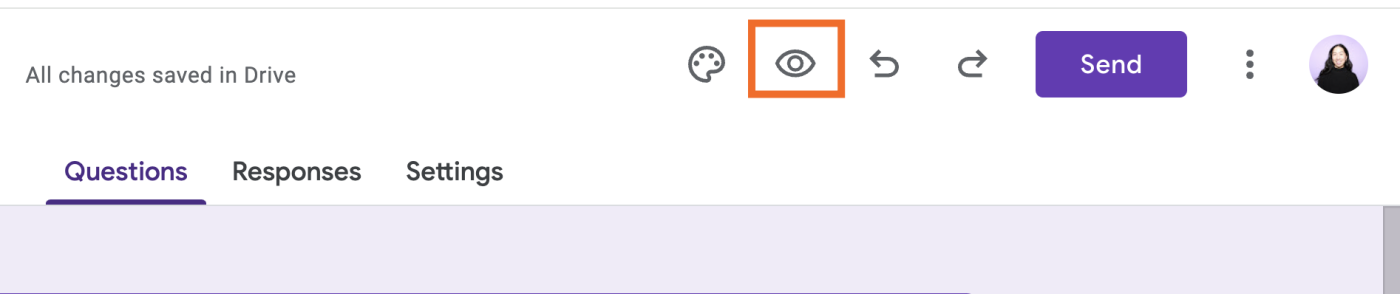
At any point, you can click the Preview icon, which looks like an eye, above your form to make sure your survey is flowing the way you want.
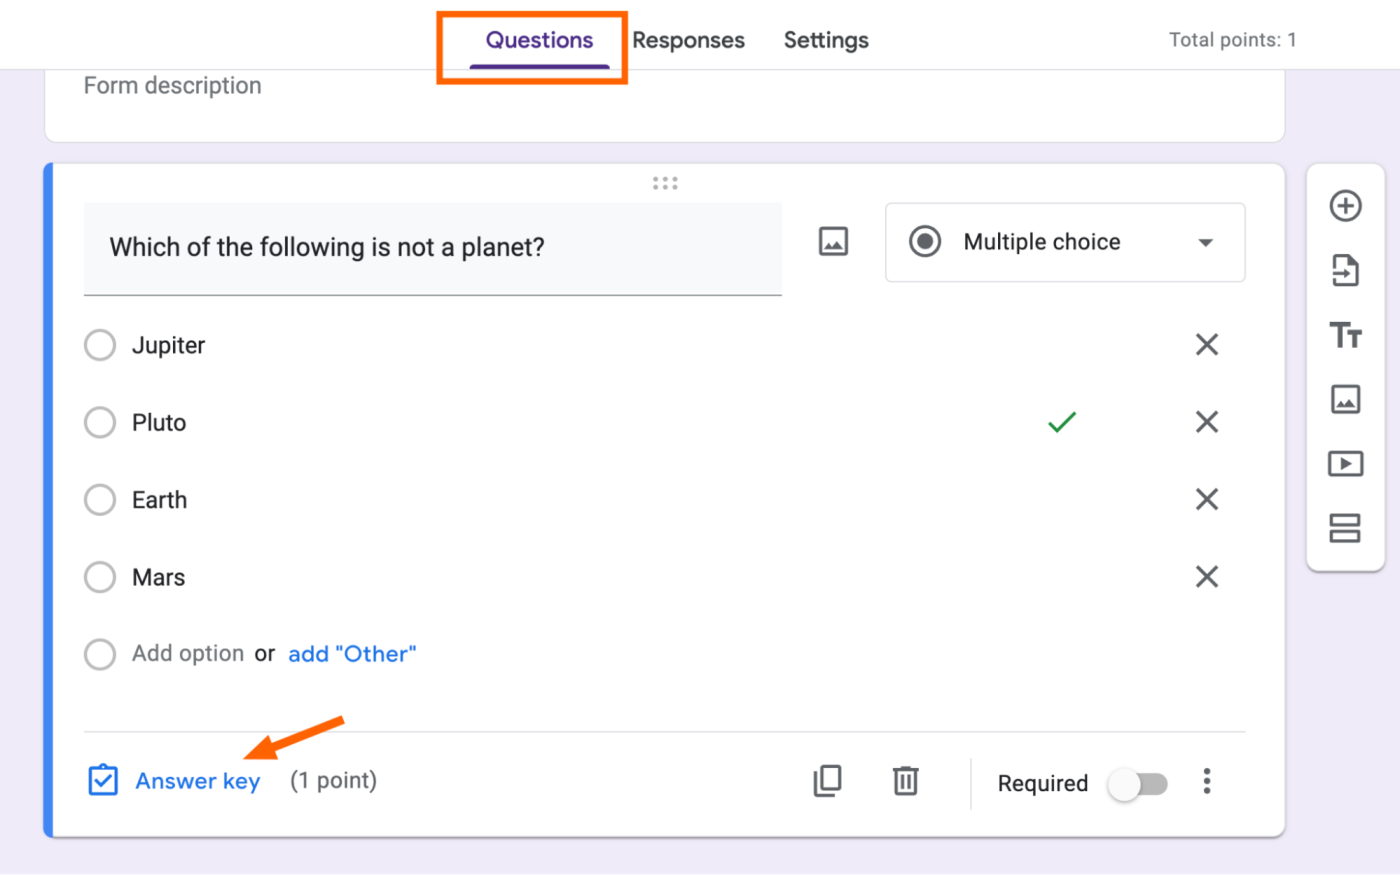
Another way to make an interactive form is by turning it into a quiz. The quickest way to create a new quiz in Google Forms is by going to g.co/createaquiz. If you want to turn an existing form into a quiz, click Settings, and then click the toggle next to Make this a quiz.
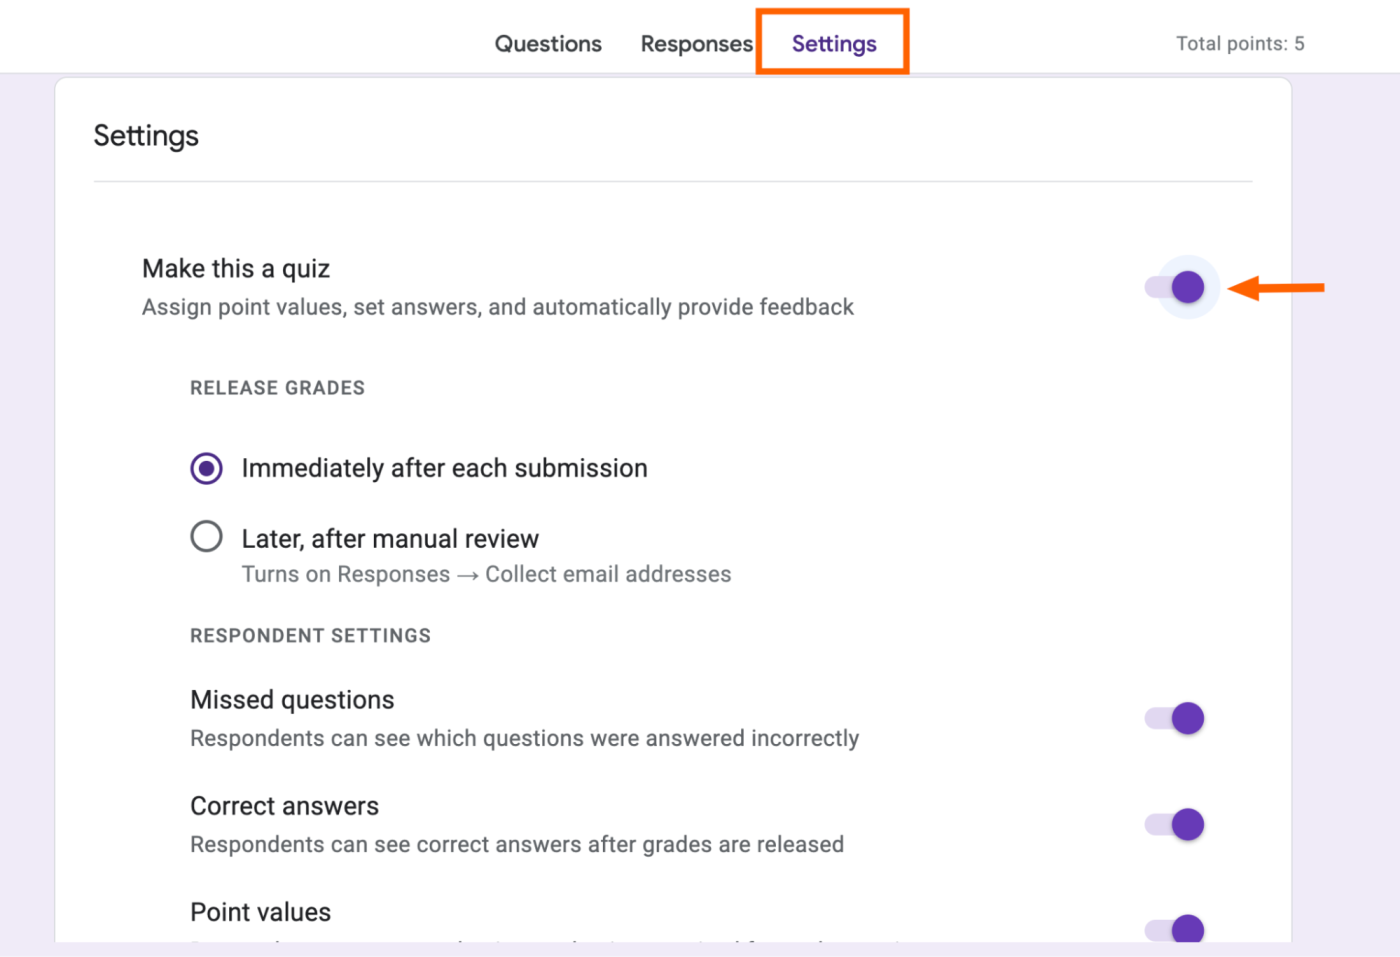
From the Settings menu, choose whether to show the results immediately after the form is submitted or after you review the answers. If you choose the latter, your form will prompt respondents to first sign in with their Google account.
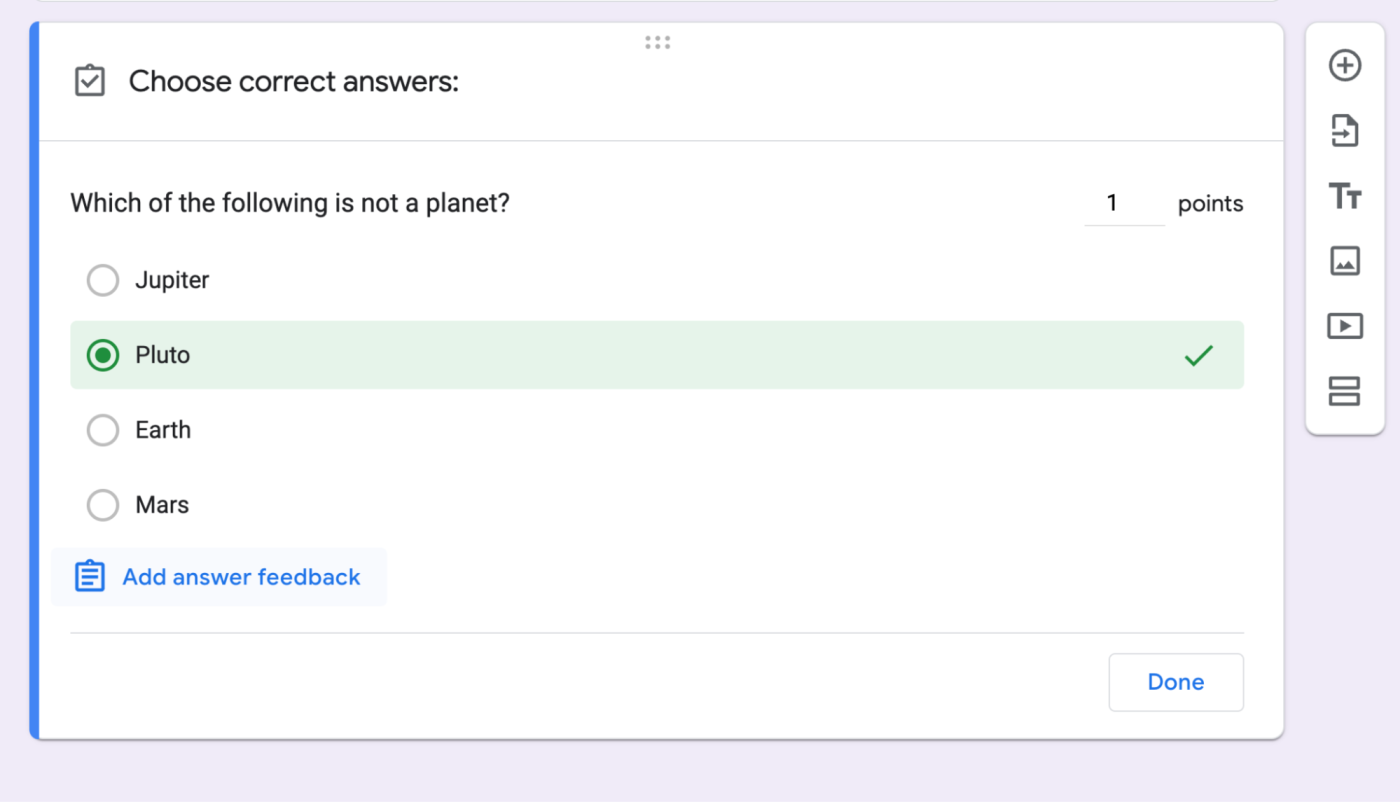
You can then choose to show missed and correct answers, as well as a value for each option. With these options enabled, you'll need to update your answer key.
Note: You can use any question type—such as Multiple choice, Short answer, and even Date—in a Google Forms quiz.
When you create a new form, the default design—if you can call it that—is a purple color theme. But it's easy to change the design and include a header image to add a little personality or to match your company's branding.
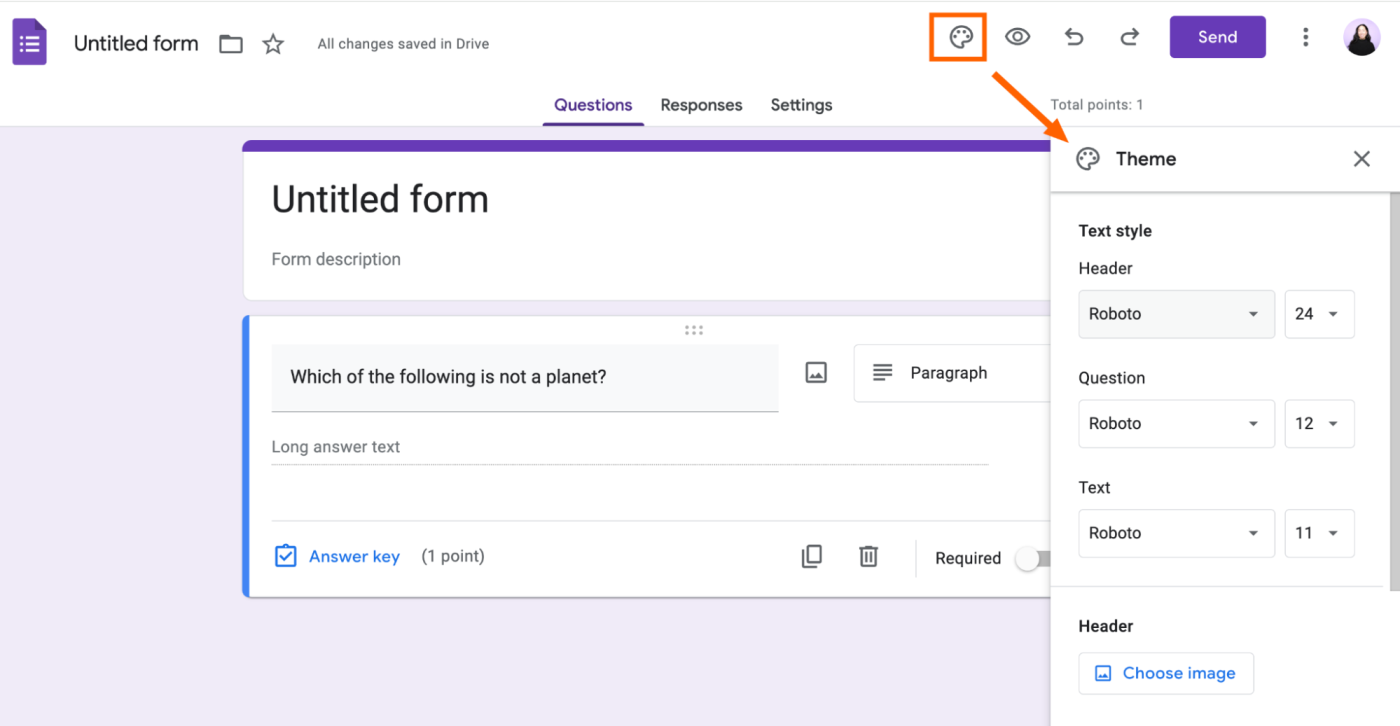
Here are more tips on how to make the perfect Google Forms header image and adjust the color theme to match your brand.
Unlike in Google Docs, there's no straightforward way to create and share Google Forms templates. But there's a simple workaround.
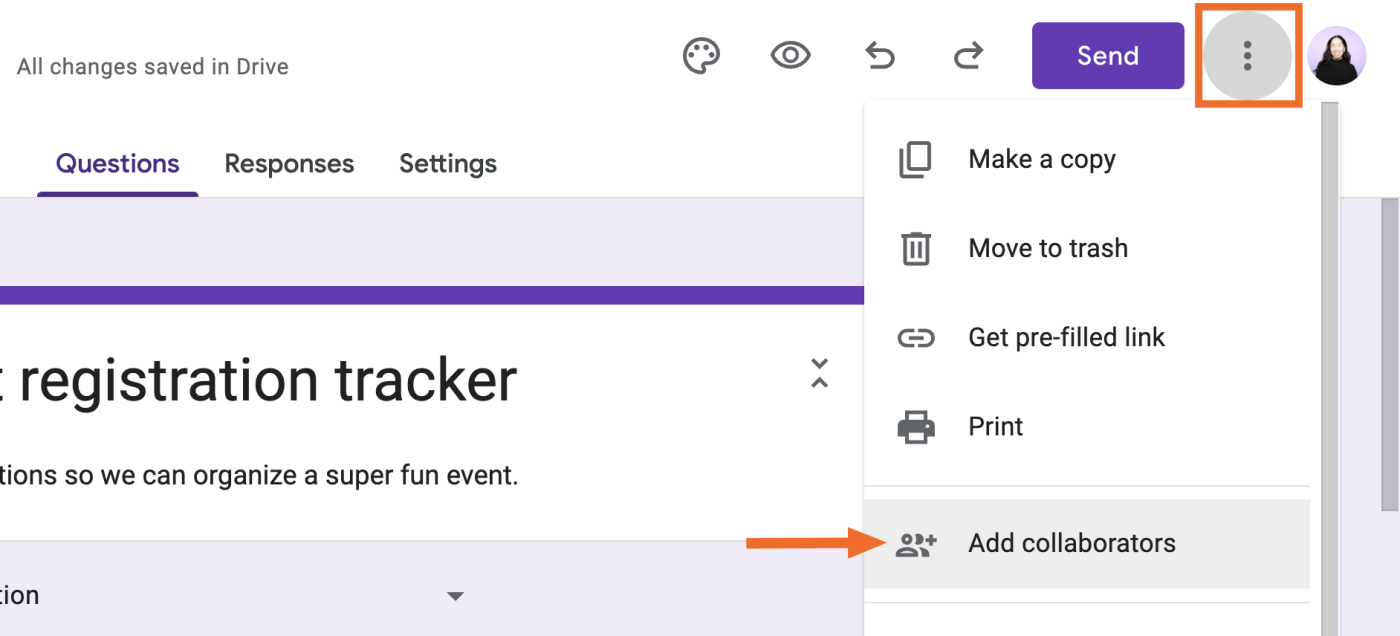
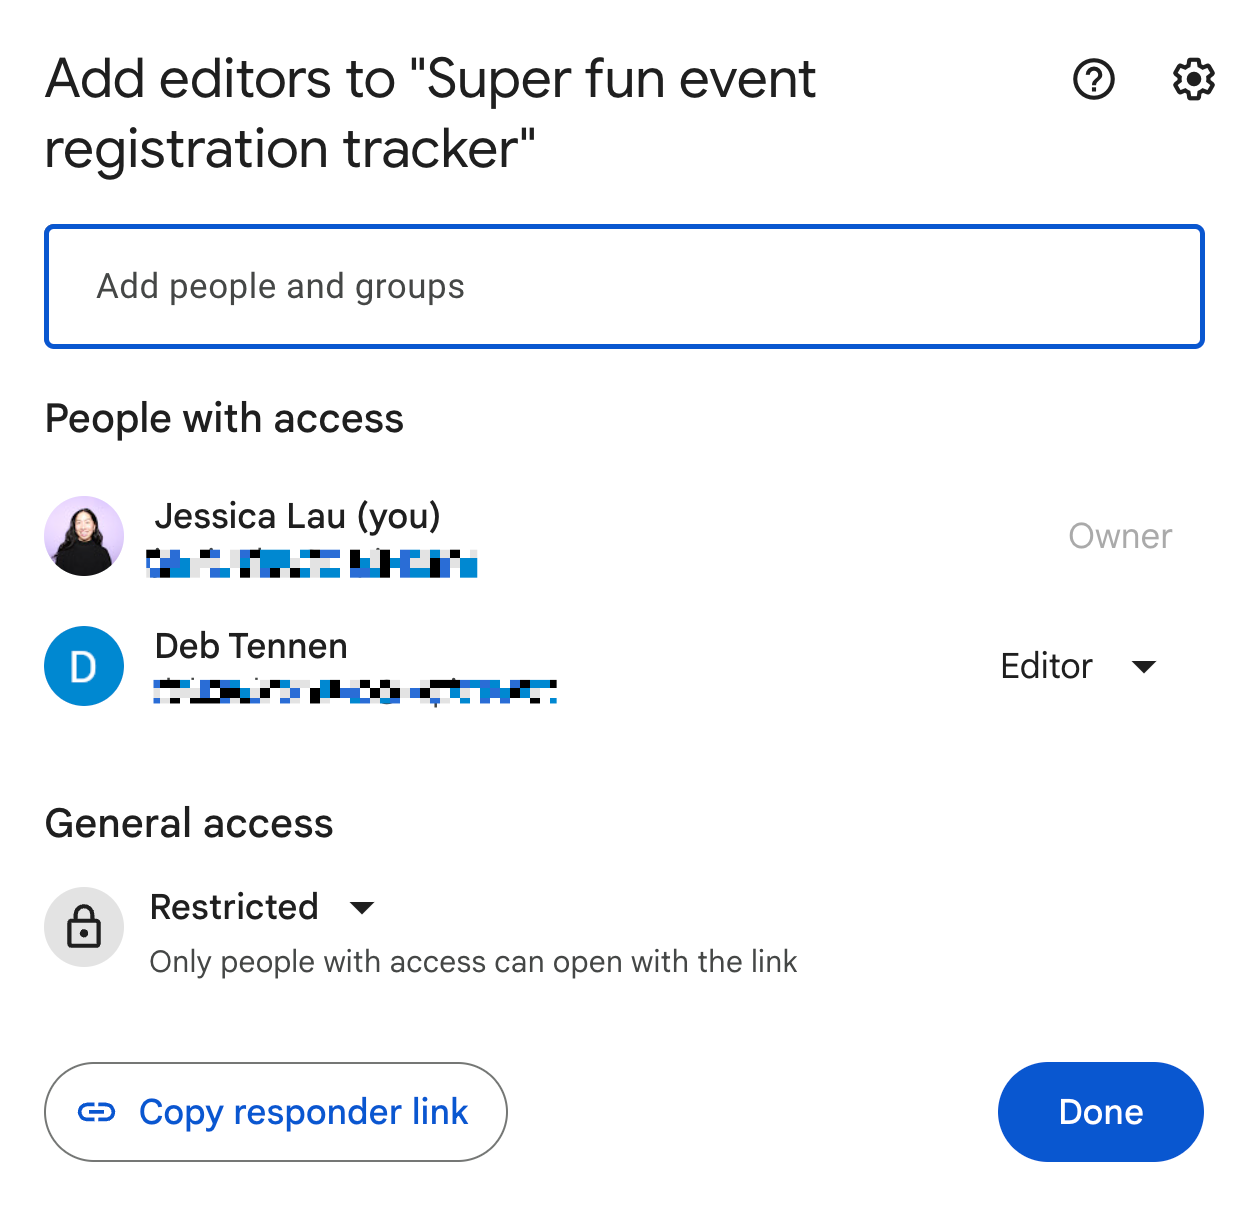
If someone else wants to use your template, add them as a collaborator and then share a link to your form.
Once your form is finished, be sure to check the form settings before sharing it with the world. Here are some fields you may want to pay extra attention to.
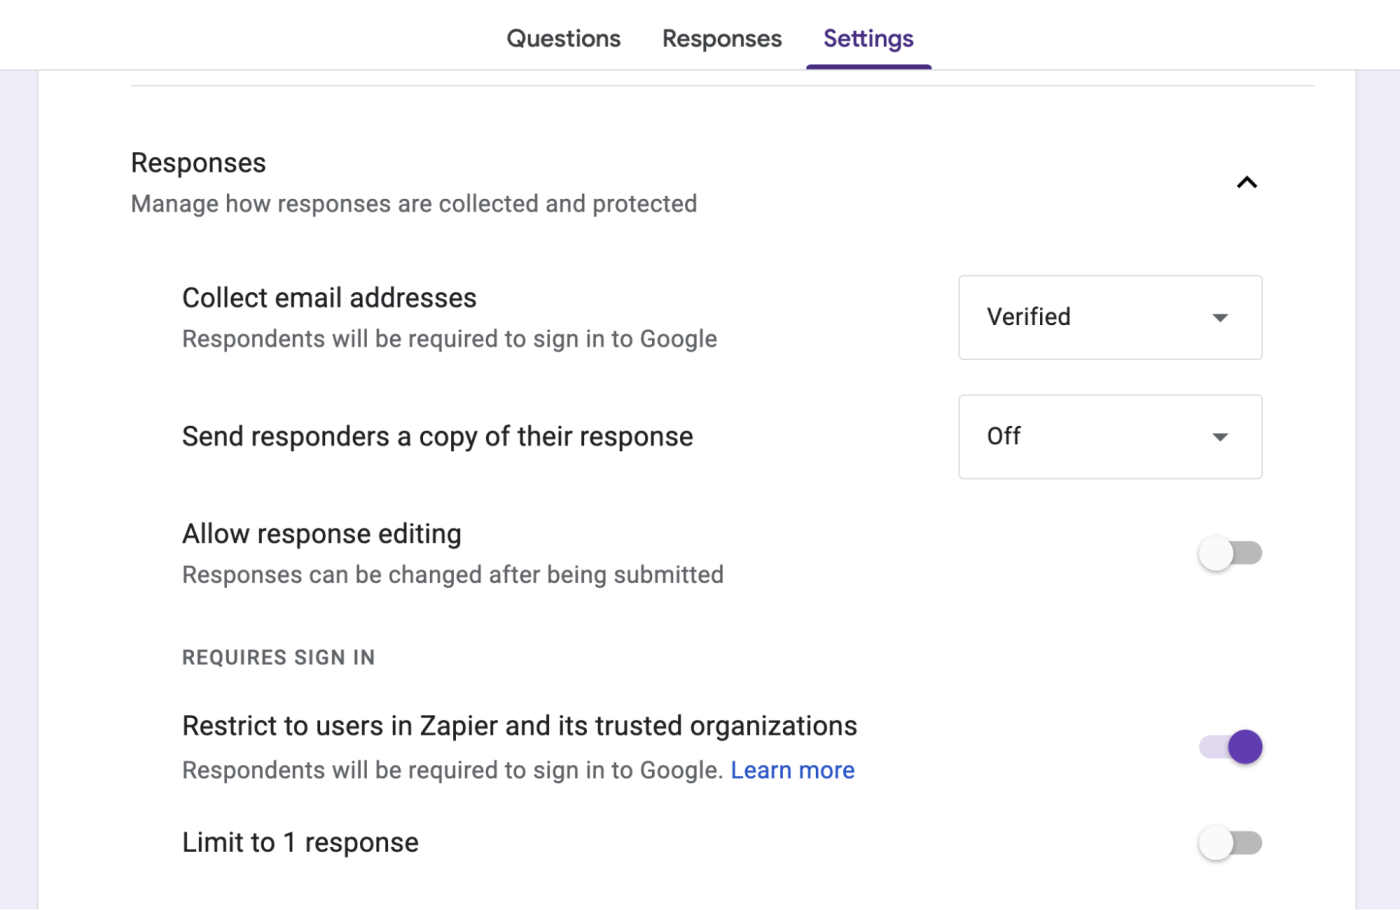
These settings let you manage how responses are collected and shared. You can limit users to submitting only one form, allow them to edit their responses, or receive a copy of their responses. You can also choose to collect email addresses and share the form either with only your organization or publicly with anyone who has the link. And you have the option to collect respondents' usernames (their Google Workspace email addresses), which is helpful if you need to follow up with someone.
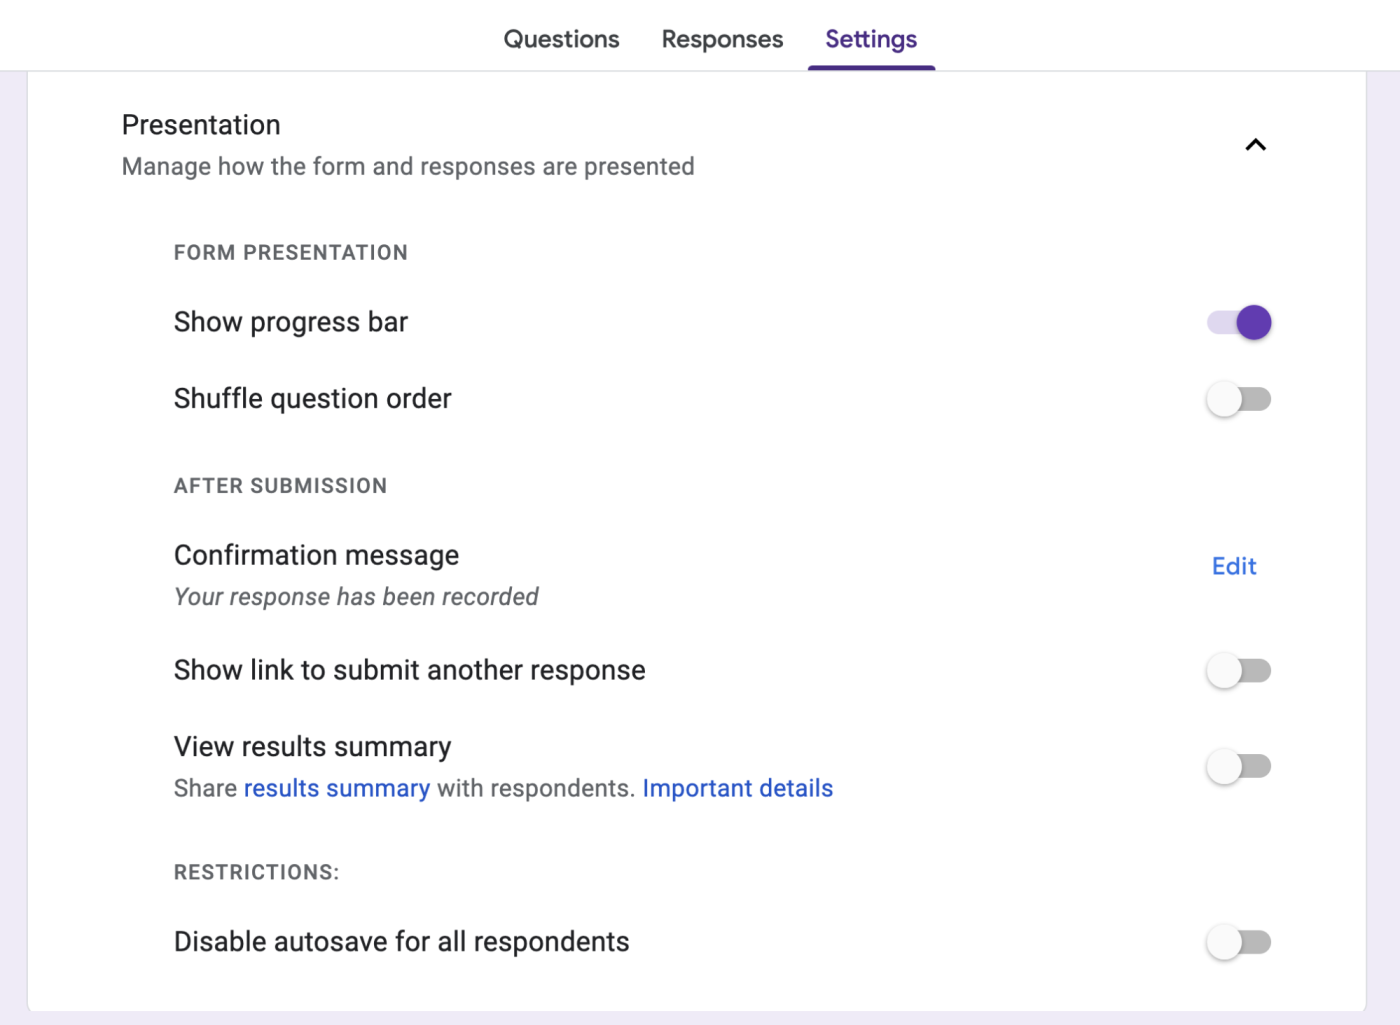
These settings let you manage how the form is presented and add a confirmation page to your form. This works the same as the form description field, but it's really bare-bones—you can't format the text or add hyperlinks. You can also choose whether to show a progress bar, shuffle your question order, or show links to submit another response.
Language isn't a setting you can adjust directly from Google Forms, but it's worth noting that Google will display the form's interface in the default language for your recipients' location. If your readers are in, say, Japan and your form questions are in English, user interface (UI) text like Required and Submit will appear in Japanese while your questions appear in English. If that's an issue, add a note to the beginning of your form to remind people to first update their preferred language.
If you want to get feedback from your team on your form, here's how to collaborate on Google Forms.
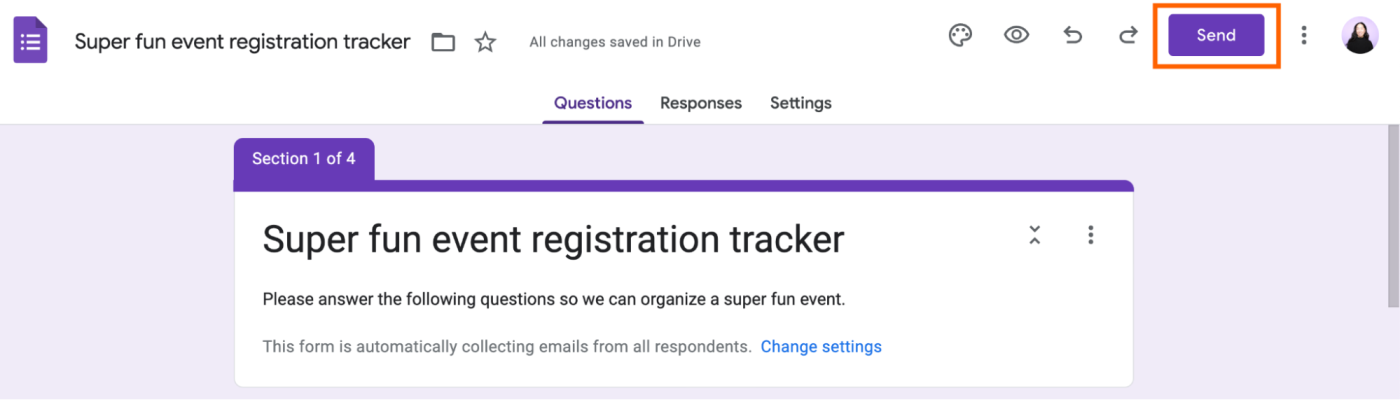
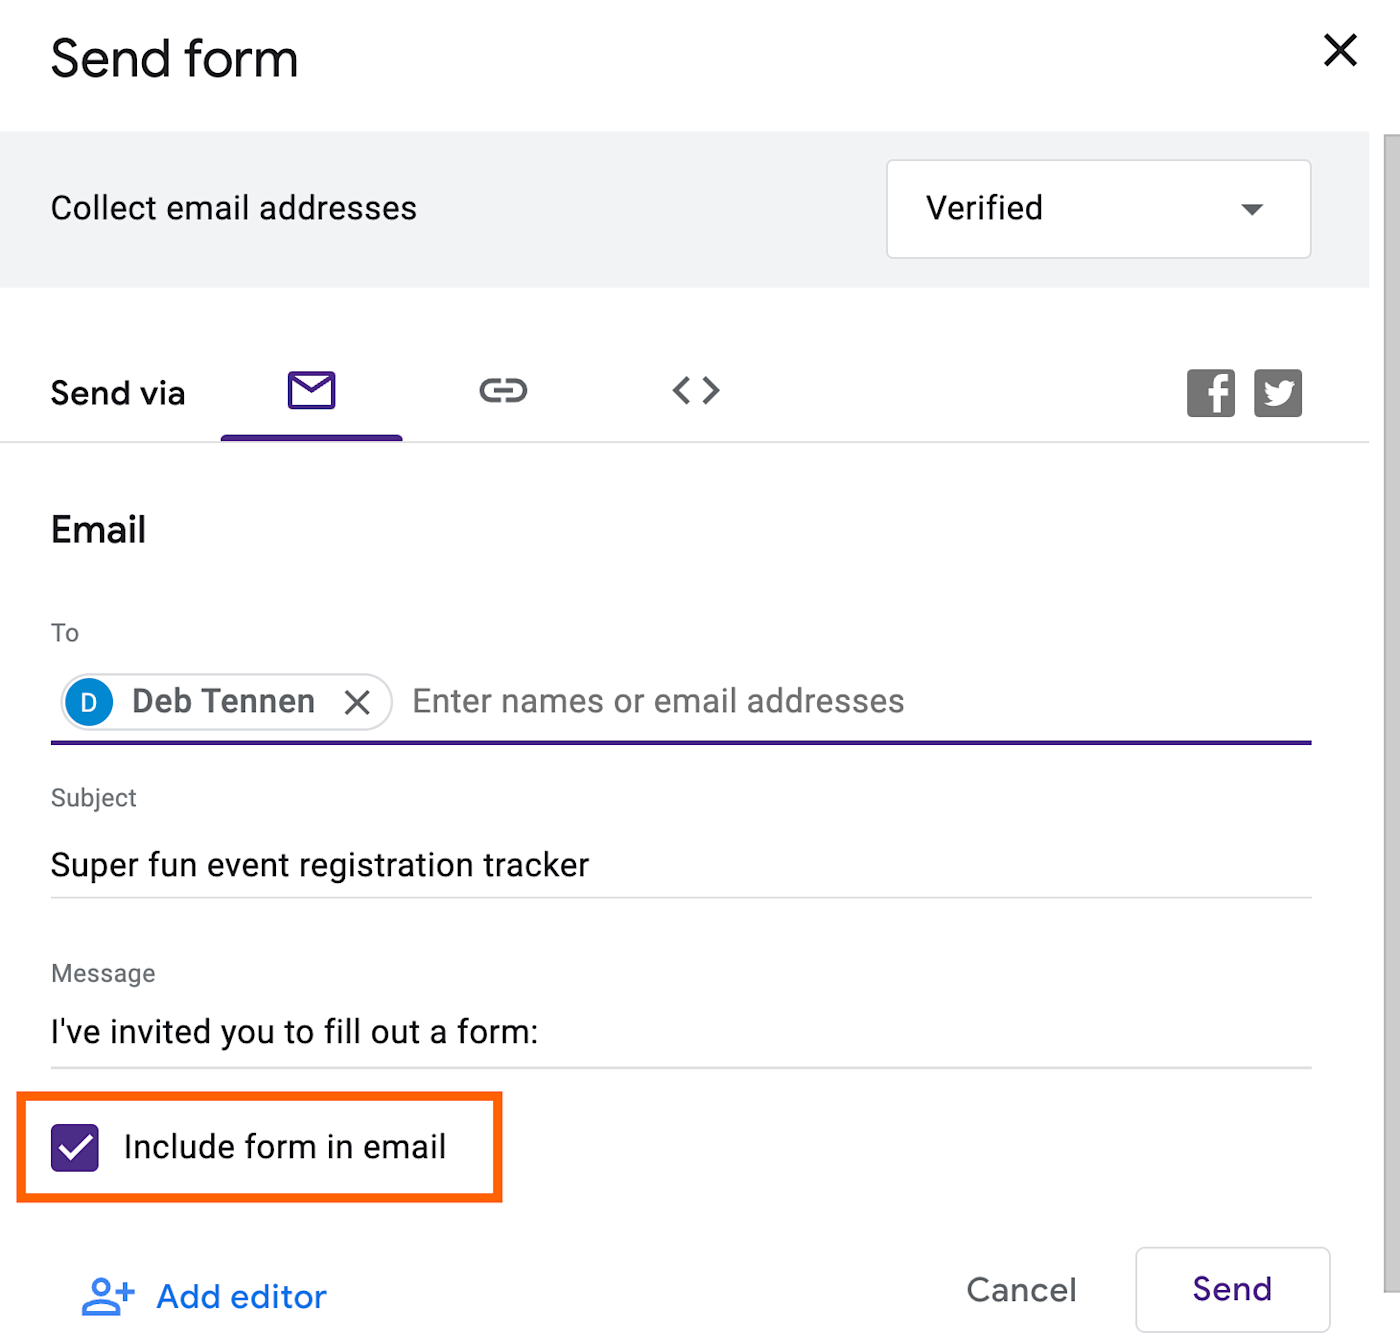
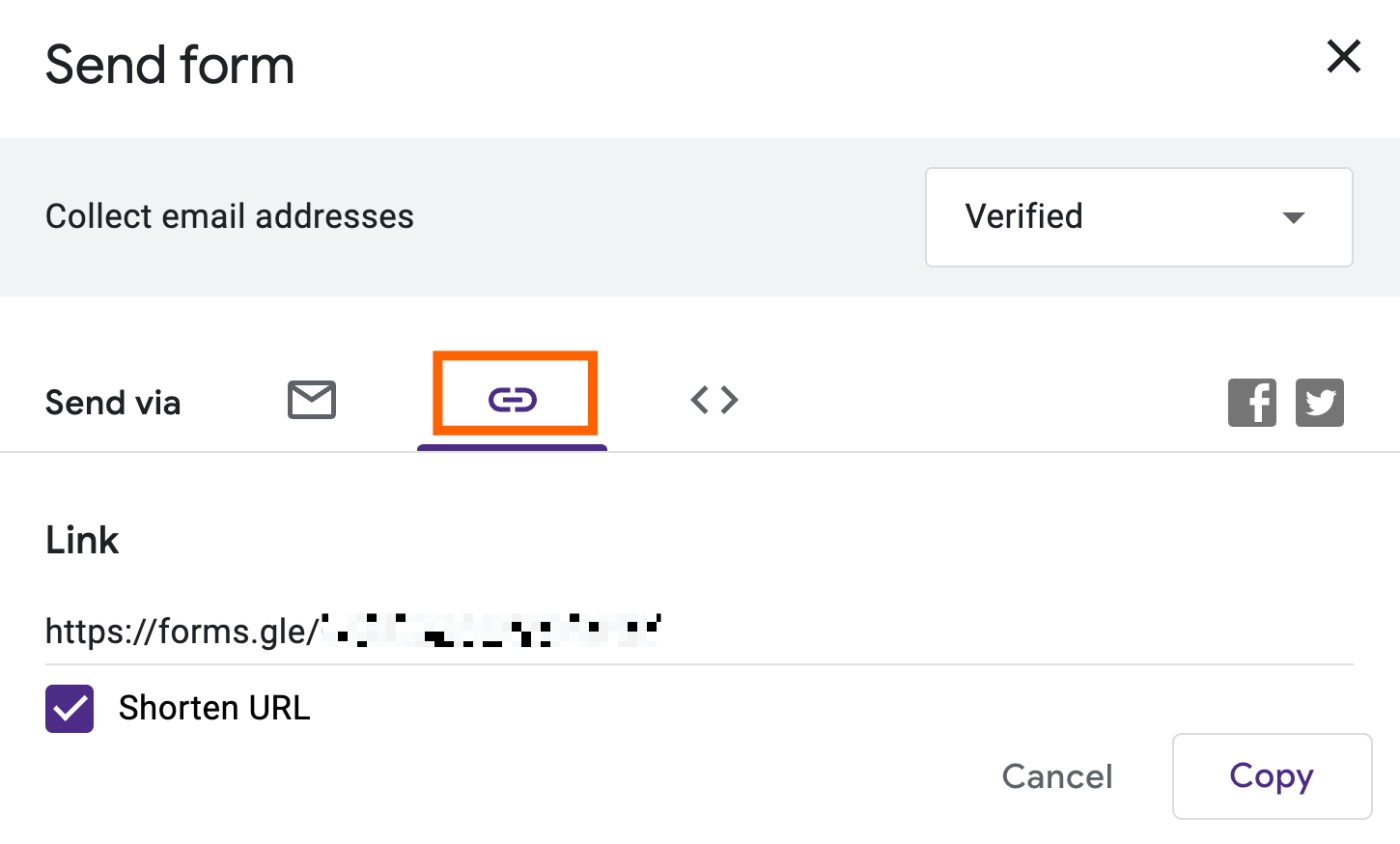
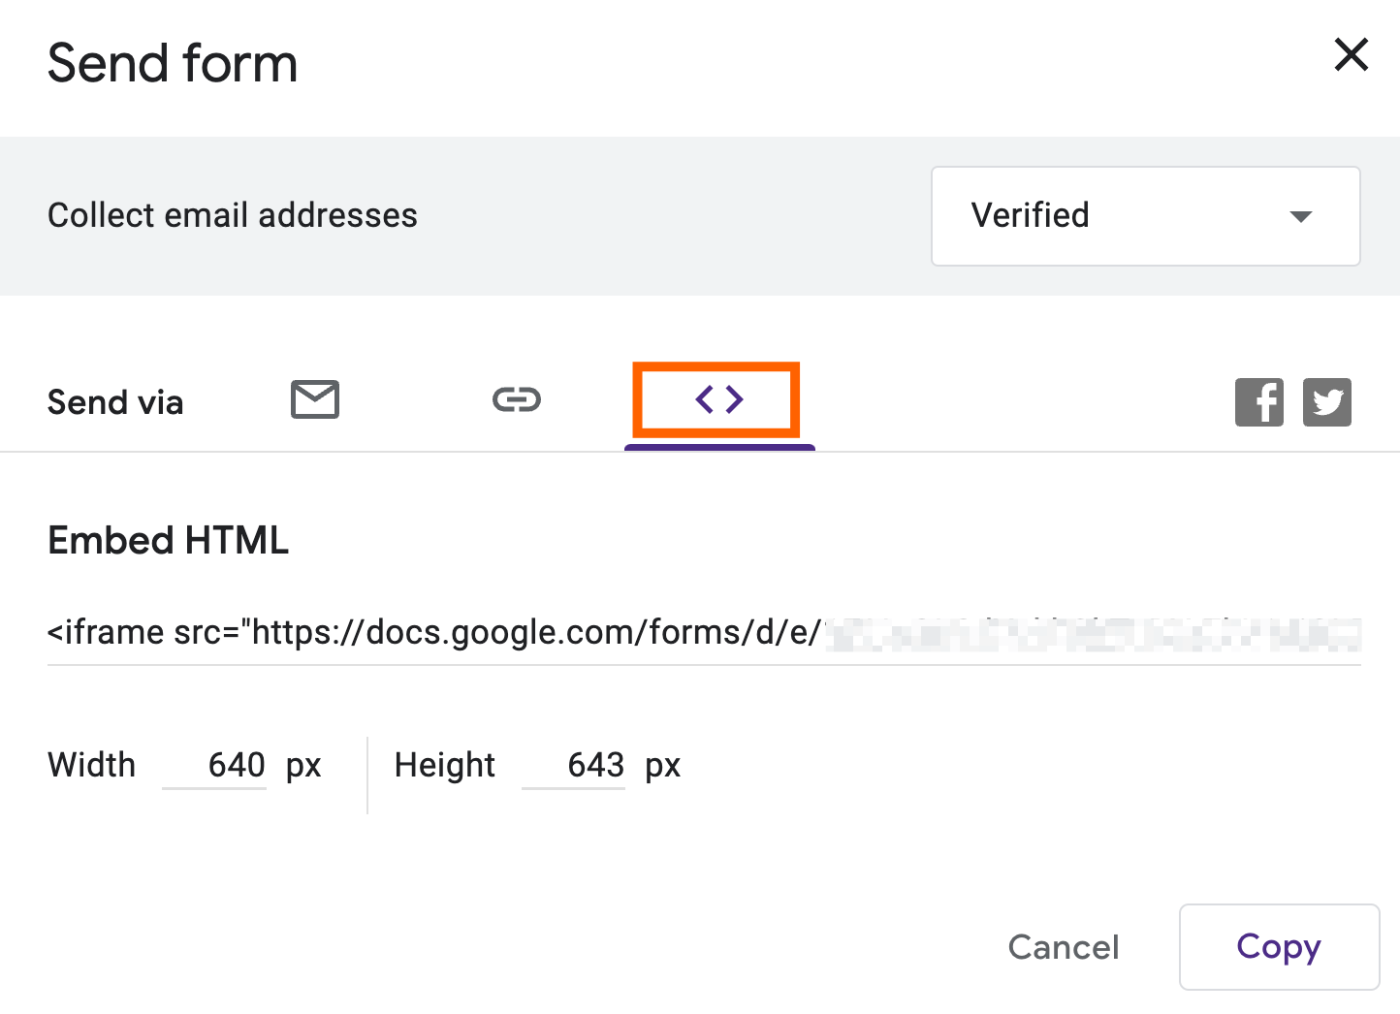
Once you're ready to share your form, click Send above your form.
From here, you have three ways to share the form.
Want to get feedback with a form partly filled in? Perhaps a contact clicks a button on your site that says they dislike one product, so you want the survey form to automatically reflect that. Or maybe you have a form that needs to be filled out with similar info each week, and you don't want to re-type it.
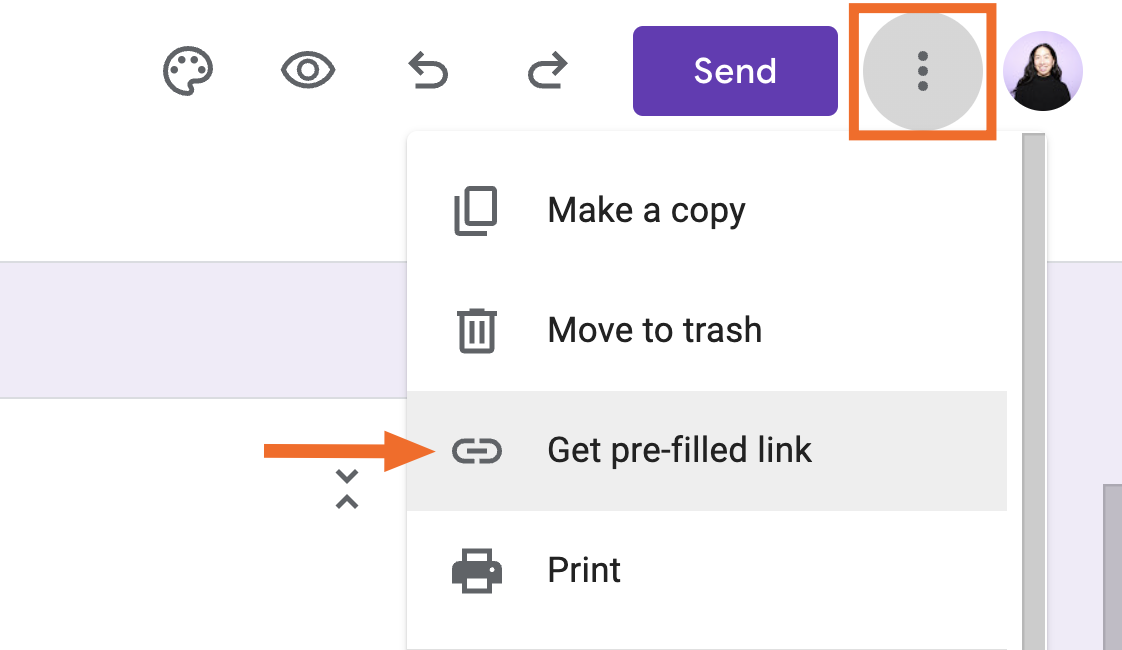
The only downside is that Google Forms doesn't store pre-filled links for you to reference and share at a later date. You'll have to repeat the process every time you want to share the pre-filled form.
Need to gather responses offline? Google Forms can help with that, too.
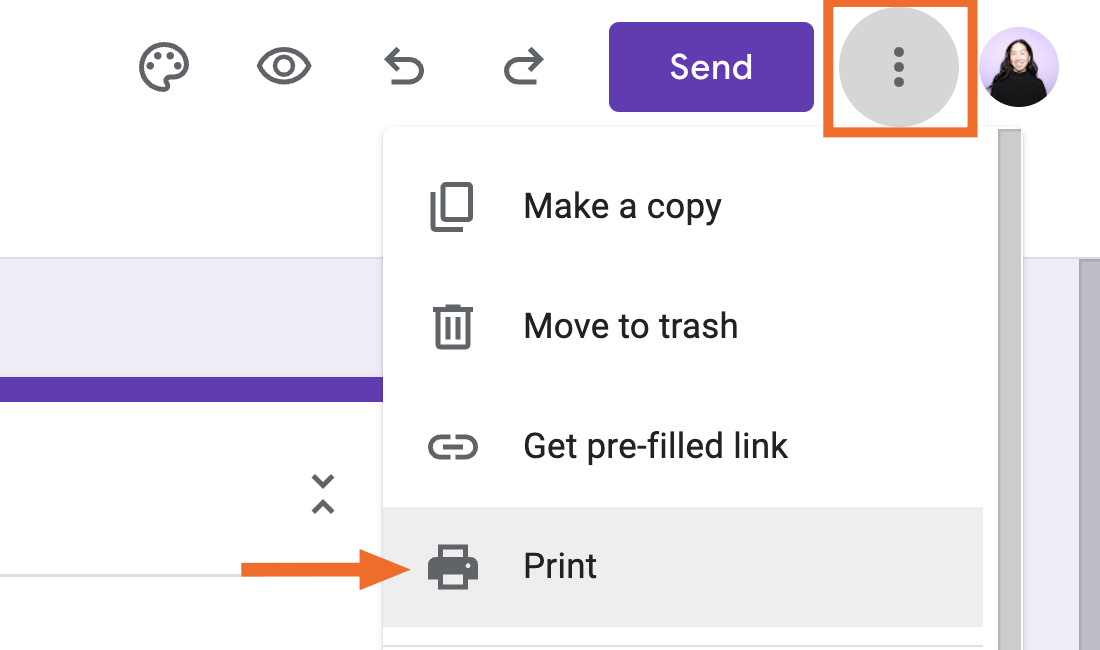
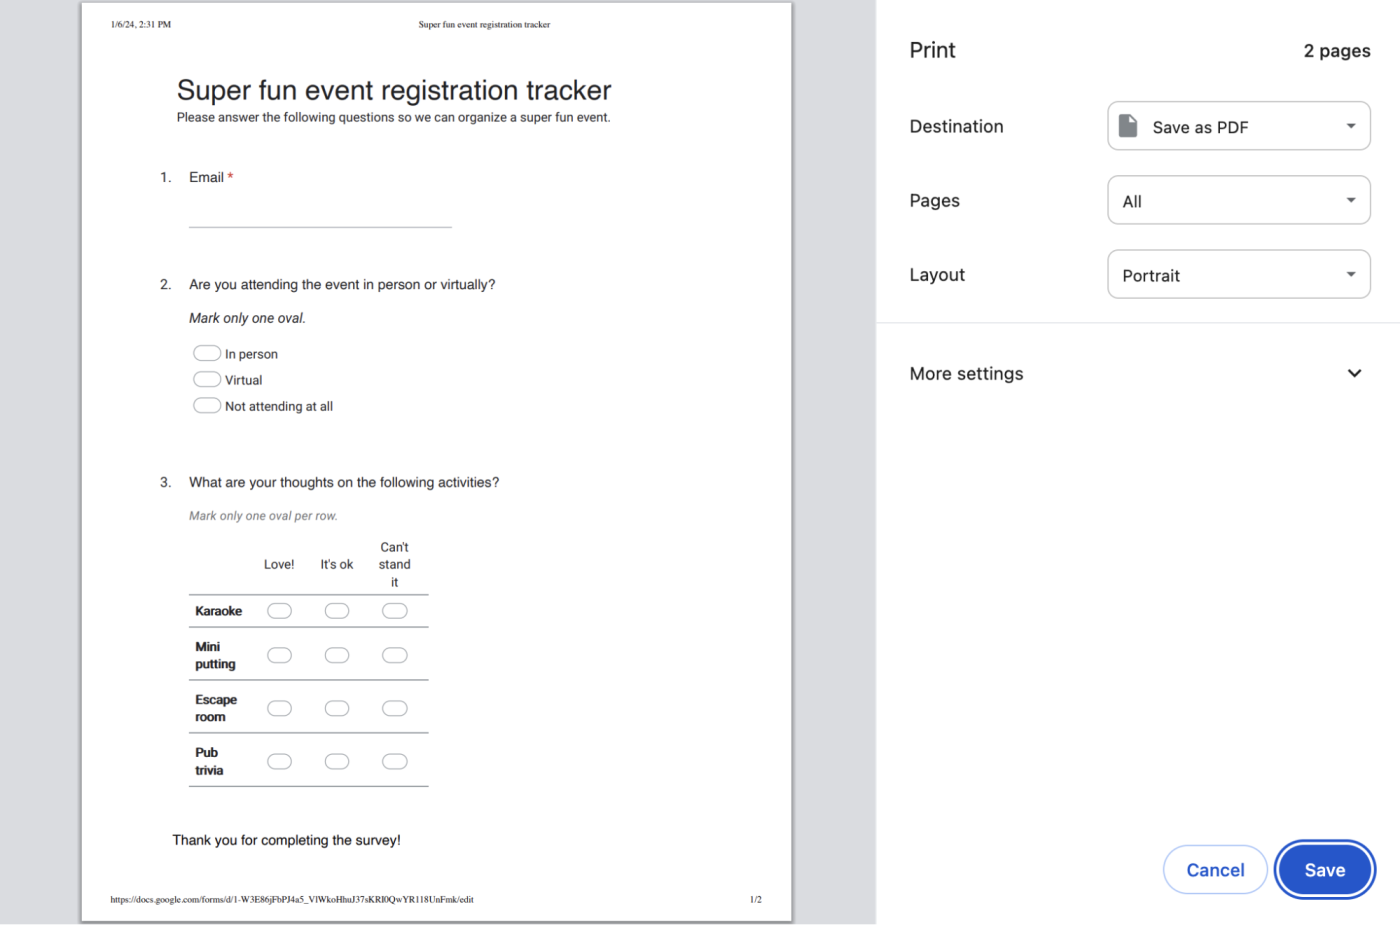 Example of a PDF-version of a Google Form." />
Grids and multiple-choice options show pill buttons to fill in, while text, date, and time fields include blank lines for answers.
Once respondents have filled out your paper forms, enter their answers into your Google Sheets spreadsheet to save them along with your other form entries.
Once you've created and shared the form, you don't need to do anything extra to store respondents' answers in Google Forms.
Click Responses to view individual responses, summary lists and graphs of responses, and an option to send an email reminder to anyone who still needs to complete the form.
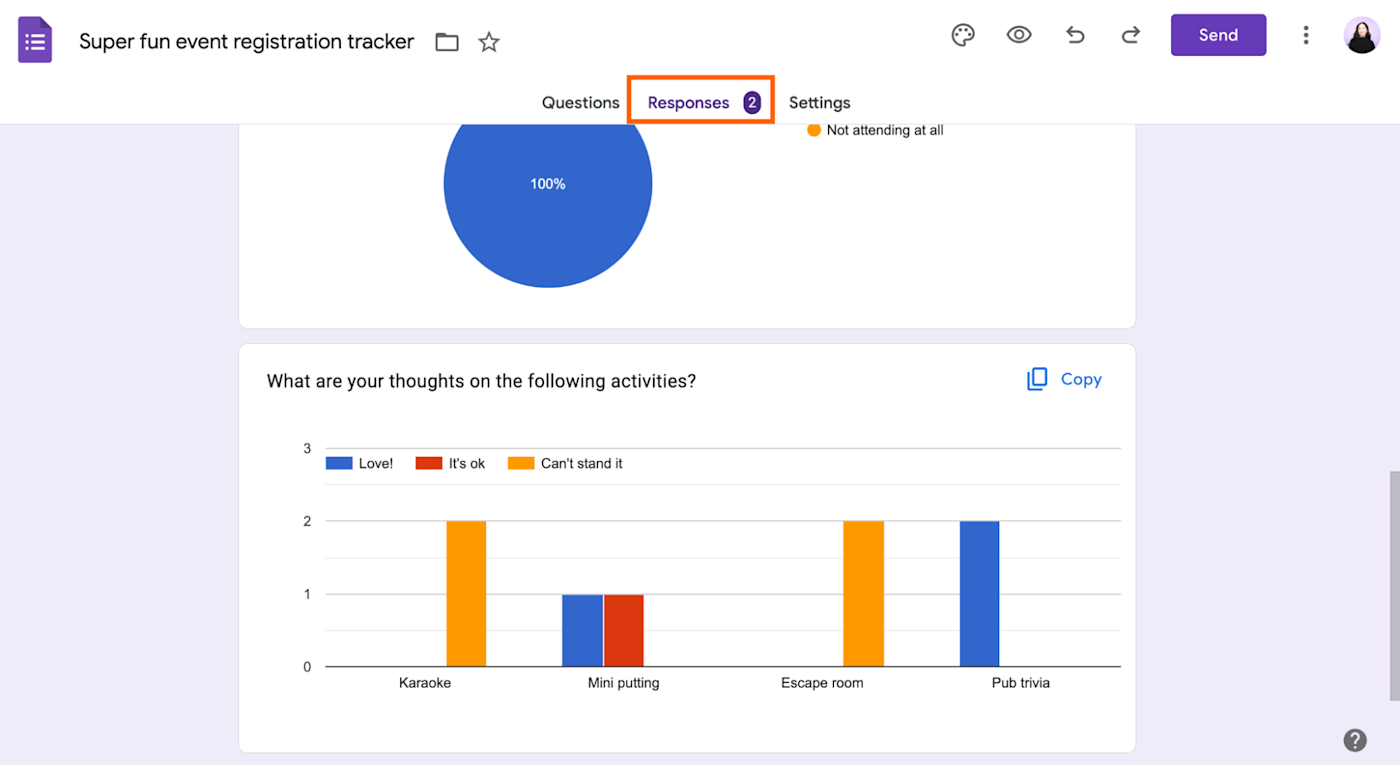
The graphs and lists are great for a quick overview of responses, but if you want a more detailed breakdown in a Google Sheets spreadsheet, click View in Sheets.
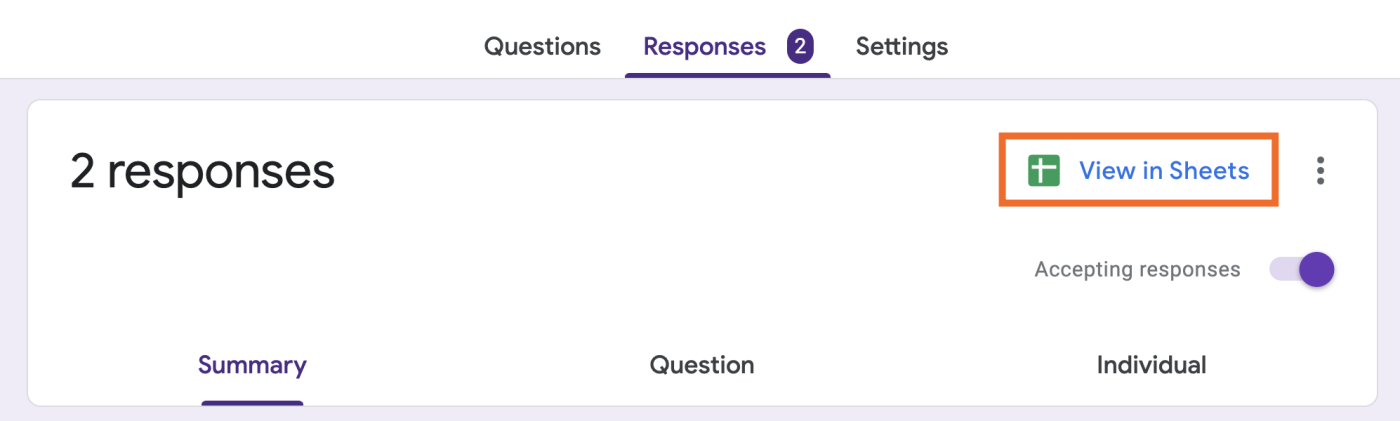
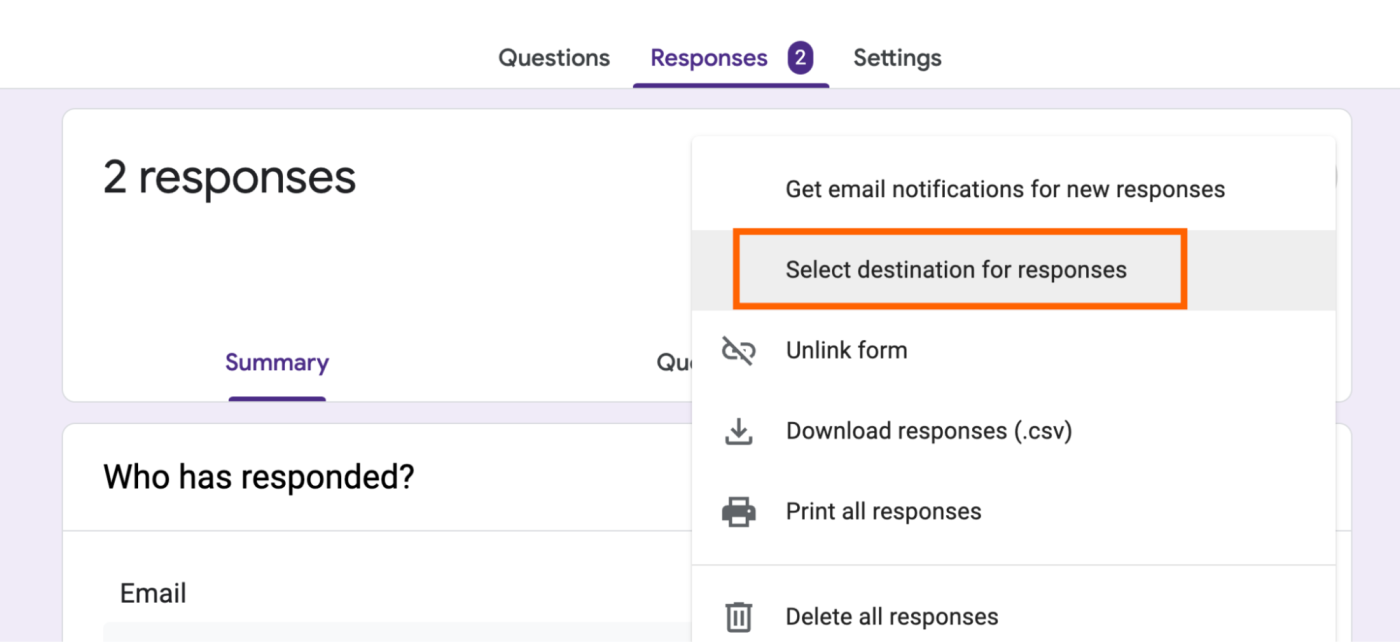
Want to create a new spreadsheet or select an existing spreadsheet to store your answers in instead? Click the More icon ( ⋮ ) next to the summary of total responses, and then click Select destination for responses.
Note: You can store results from multiple forms in one spreadsheet, but each form's responses will save to separate sheets.
One great thing about saving Google Forms entries to a Google Sheets spreadsheet: it's fast. Change your form field names, and they're automatically updated in your spreadsheet. Get a new entry, and it'll show up in the spreadsheet as soon as your recipient clicks Submit.
Note: You can change form questions and answer options at any time, but if you do, it won't change entries that have already been added to your spreadsheet.
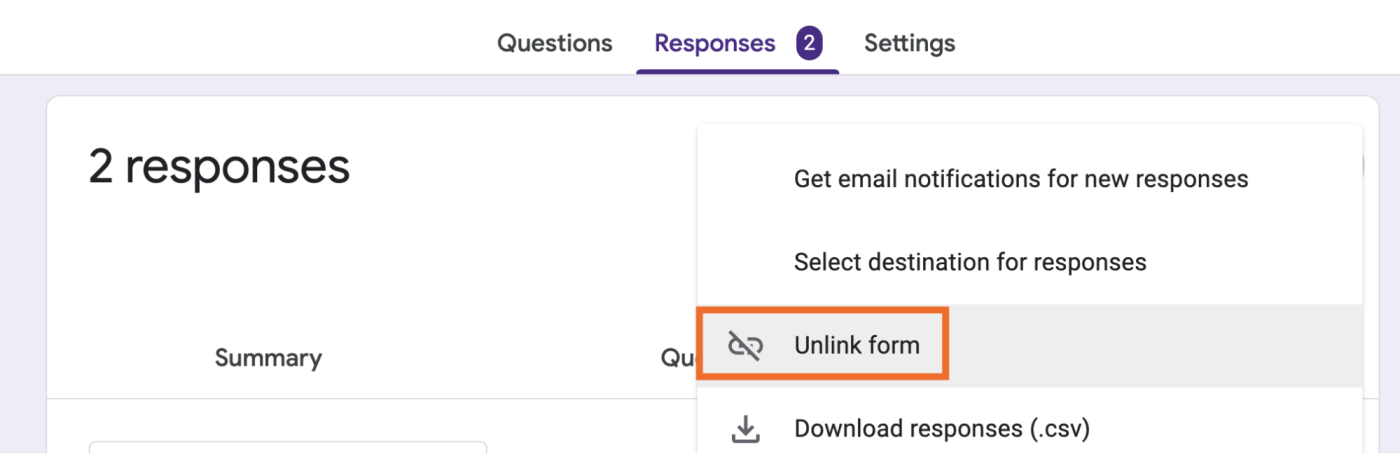
Accidentally deleted something from your spreadsheet? Google Forms always keeps a full copy of your form data. The easiest thing to do is unlink and relink your form and spreadsheet. Click the More icon ( ⋮ ) next to the summary of total responses, and then click Unlink form.
Then reconnect the form to your spreadsheet, and Google Forms will add all the form data back to a new sheet.
With your form data in the spreadsheet, you can use Google Sheets' formulas to calculate values or make custom graphs to visualize your data. Add conditional formatting to the spreadsheet, and you'll be able to see patterns in your form responses at a glance.
Learn more about using Google Sheets
Google Forms is great on its own, but odds are it's still missing some features you want. There's an entire library of add-ons specifically for Google Forms that lets you do things like customize form notifications and take signatures in a form.
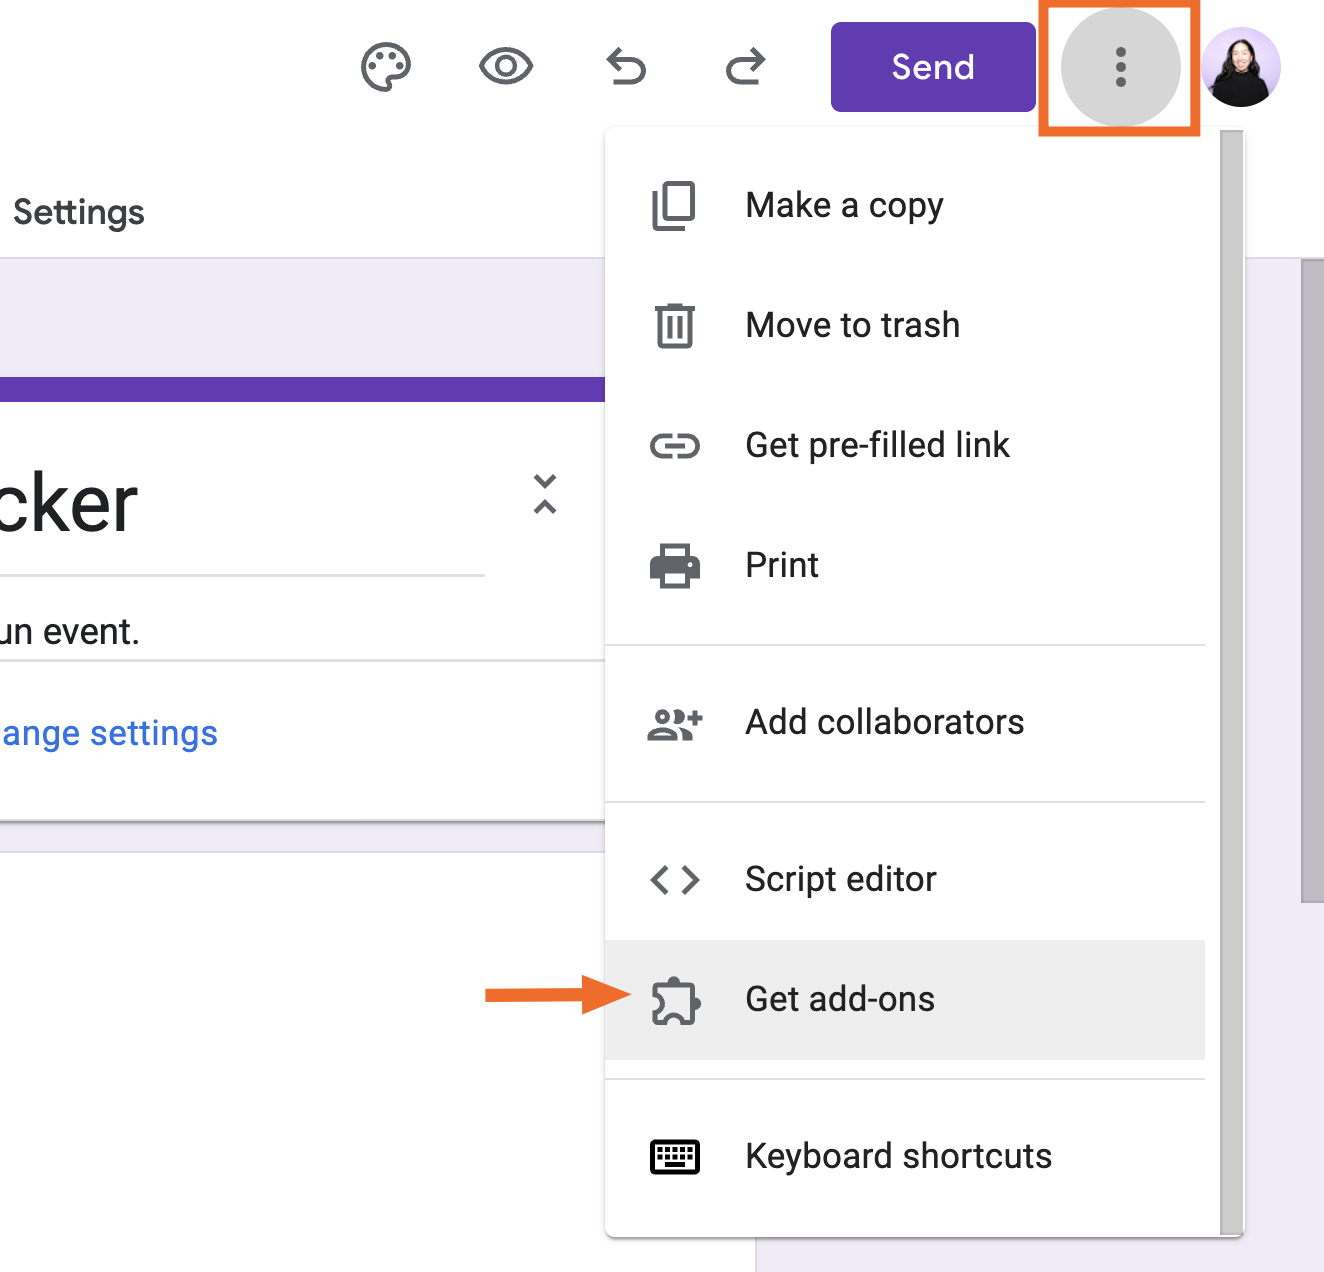
To use an add-on, click the Add-ons icon, which looks like a puzzle piece, above your form, and select the tool you want to use. It'll then run in the background automatically.
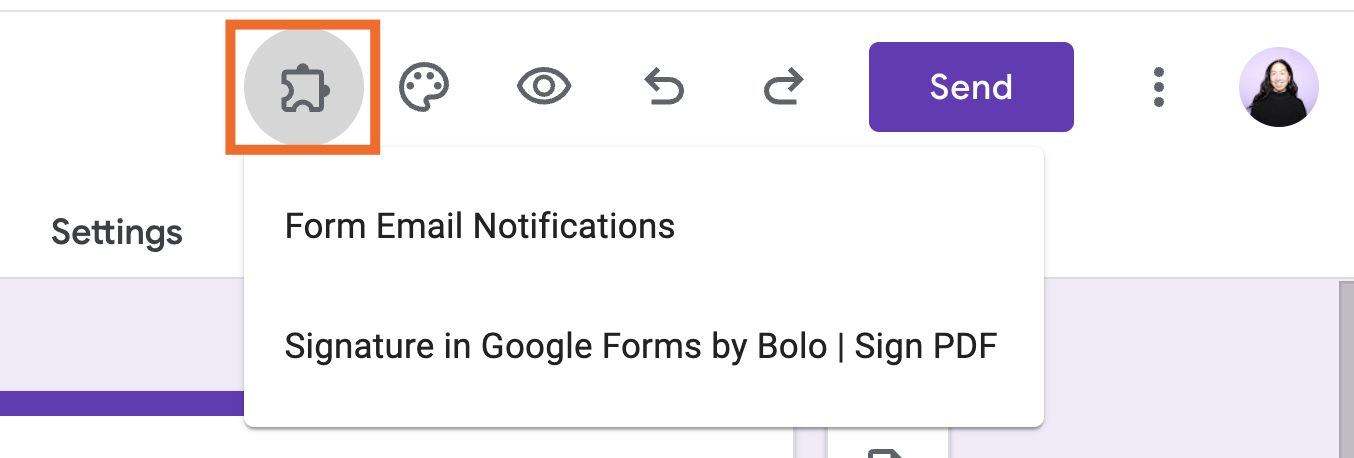 How to access add-ons from the Google Forms editor." />
There's no straightforward way to remove add-ons directly from Google Forms. The easiest way to manage your apps is by going to Google Workspace Marketplace and uninstalling the apps you no longer want.
Google Forms offers a robust feature set to create and share dynamic surveys. But once you've received a form submission, actually doing anything with that data requires some manual work—whether that's copying it over to a to-do list or messaging your team. With Zapier, you can eliminate that manual work. Connect Google Forms to your other apps, so you can automatically do things like:
Learn more about how to automate Google Forms, or get started with one of these workflows.